
Creating an Organization
Creating a clinic, inviting doctors, and switching between your personal and clinic workspace.
Until now you have used Medisa as a personal workspace: your own subscription, your own quota, your own records. A clinic is a shared workspace — several doctors working under one subscription, with billing and team management in one place.
This page covers how to create one. Who may do what is in Organization Feature, and seats are covered in Adding Organization Seats.
Personal or clinic
| Personal | Clinic | |
|---|---|---|
| Subscription | Yours alone | One subscription for the whole team |
| Quota | Your plan's quota | The full plan quota per seat, not divided |
| Billing | To you | To the clinic's billing email |
| Records | Yours | Still owned by the doctor who created them, unless shared |
| Team management | — | Invite, set roles, monitor usage |
Both workspaces live side by side under one account. You lose nothing by creating a clinic.
The personal subscription is paused, not lost
While you hold an active clinic seat, your personal subscription reads Paused — its remaining days are held and do not tick down. It resumes with the same number of days the moment you leave the clinic. See Subscription.
Creating a clinic
Anyone with a doctor account can create a clinic, and automatically becomes its Owner.
Open Settings → Team & clinics. With no clinic yet, the page offers a single button.

Press Create clinic and fill in two fields.
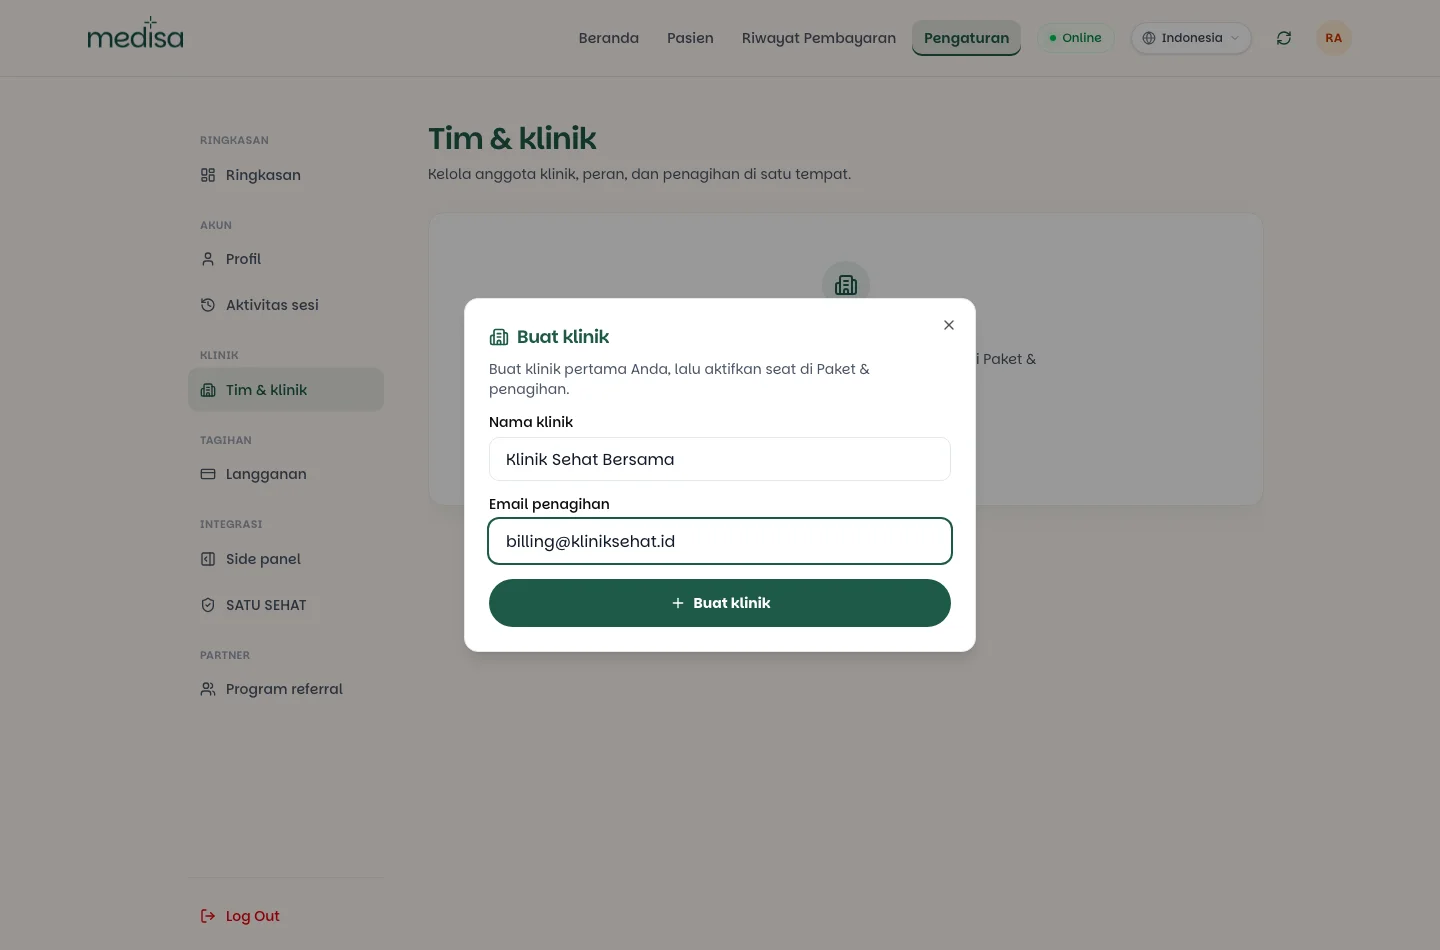
- Clinic name — what your team members will see.
- Billing email — where invoices, receipts, and renewal reminders go. It can differ from your login email; usually it is the clinic's finance address.
Press Create clinic. The clinic exists immediately, but it is not active yet — it has no seats, so nobody can work in it or be invited.
Open the Plans & billing tab, choose a plan and a number of seats, and complete the payment. The clinic becomes active once the payment is confirmed. See Adding Organization Seats.
Open the Members tab and invite doctors by email. Every invitation carries a role.
The three management tabs
Once a clinic exists, Team & clinics splits into three tabs:
| Tab | What it holds |
|---|---|
| Settings | Clinic identity (name, initial, colour, facility type), location and contact, SATU SEHAT integration, and the Danger zone |
| Members | The member list, roles, status, activity, and pending invites |
| Plans & billing | Plan, seat count, renewal date, adding and reducing seats |
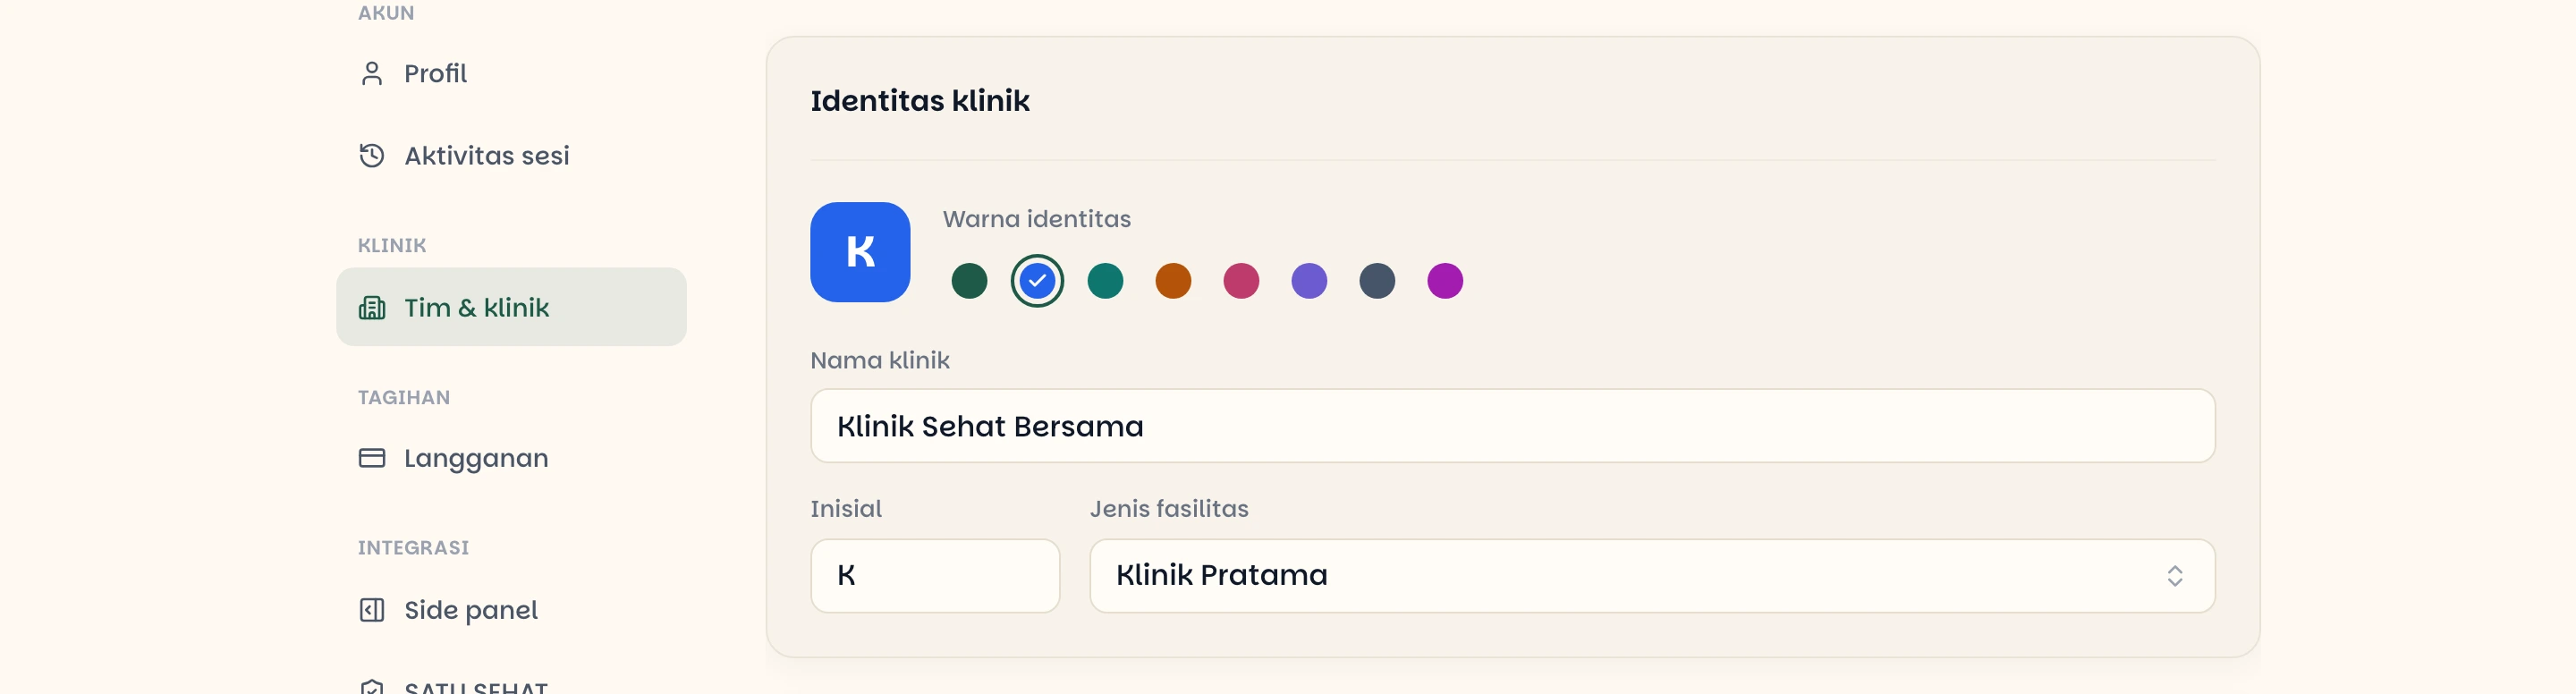
Only the clinic Owner and Admins can change Plans & billing; ordinary members see it as information only.
Inviting doctors
On the Members tab, press Invite members.
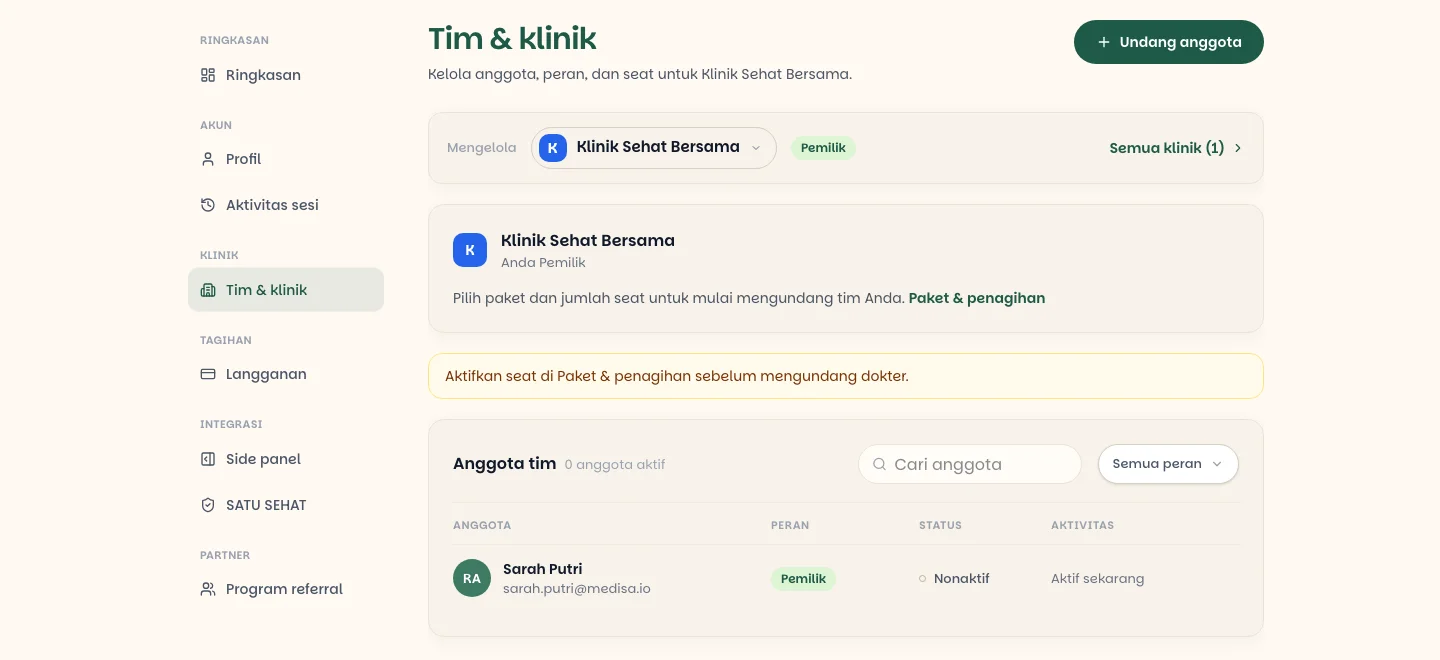
The button stays disabled until seats are activated — a clinic without seats cannot take members.
Enter the doctor's email and pick a role — Admin or Member. Medisa sends an email with a join link.
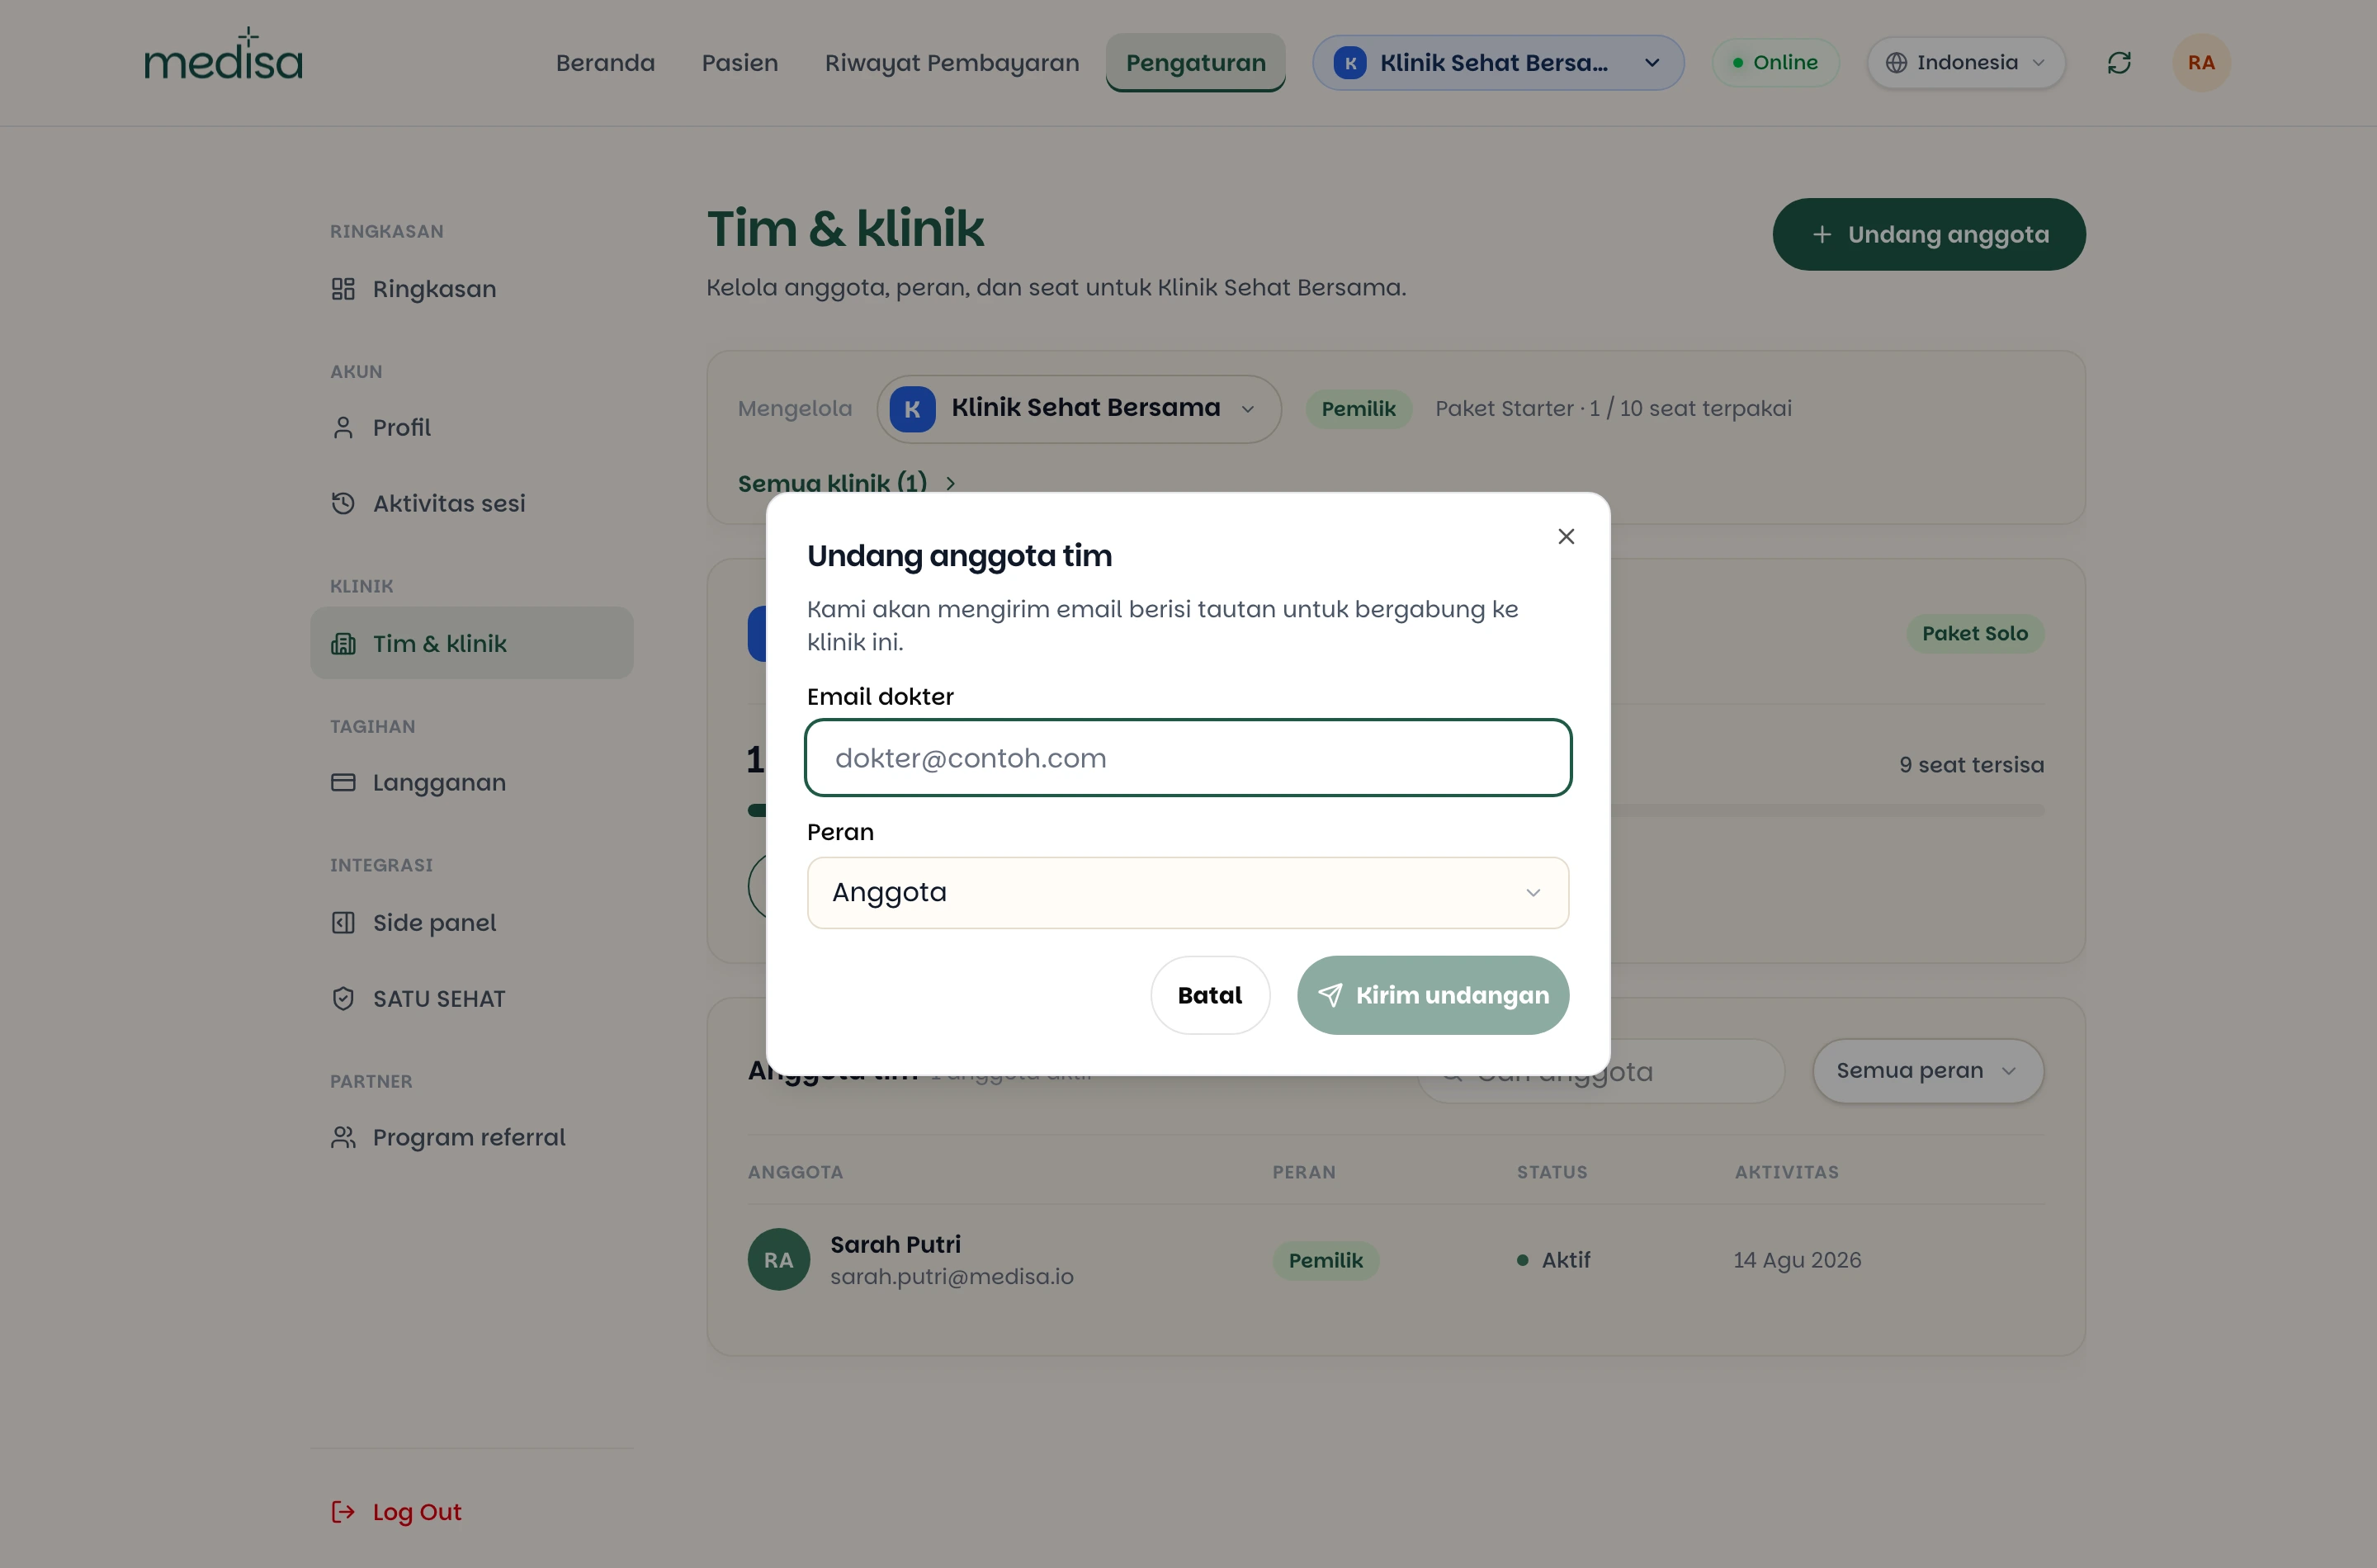
The doctor accepts through that link. If they have no Medisa account yet, they register first and the invitation attaches to the new account.
Once accepted, a seat is taken and that doctor can work immediately on the clinic's quota.
Invitations that have not been accepted appear under Pending invites with their expiry date.
A seat must be free before you invite
An invitation is rejected when every seat is taken. Add seats first, under Plans & billing.
Switching workspace
If your account has a clinic, Medisa asks which context you are working in when you sign in: continue as personal, or enter one of your clinics. That choice decides which quota is consumed and which records are visible.
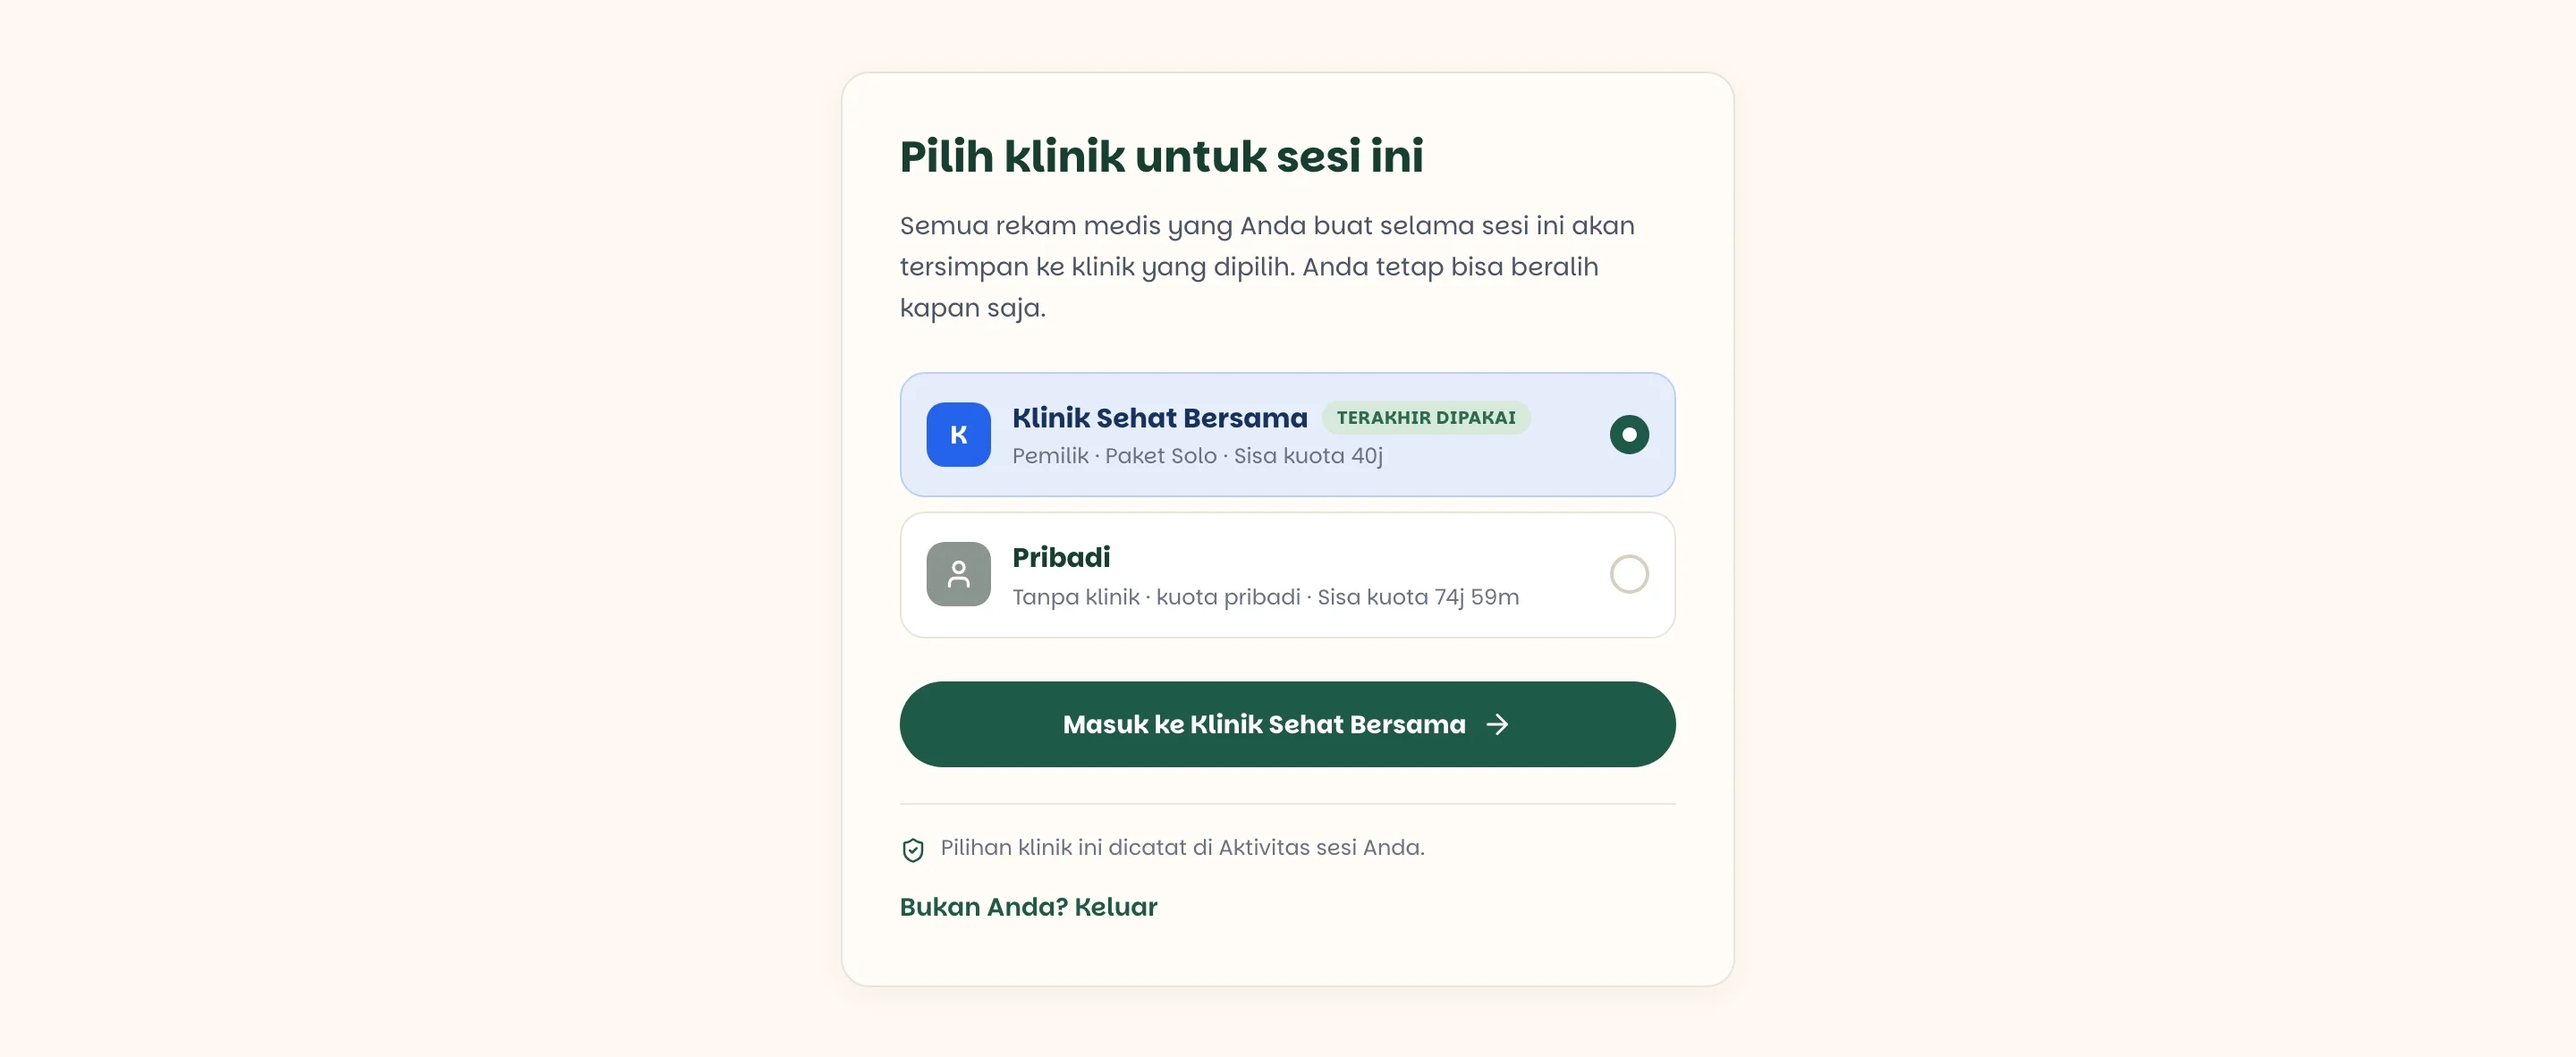
Only clinics with an active seat appear here — a clinic whose seats have not been paid for cannot yet be chosen as a working context.
You can switch at any time without signing out. Records stay attached to the workspace they were created in — switching context does not move data.
Leaving a clinic
Members can leave on their own with Leave clinic. Their seat frees up immediately for someone else, and their personal subscription resumes.
A sole owner cannot leave
A clinic must always have an owner. If you are the only Owner, transfer ownership to another member first. See Organization Feature.
If something goes wrong
| Symptom | Most common cause |
|---|---|
| The Invite members button is disabled | Clinic seats have not been activated under Plans & billing |
| An invitation is rejected | Every seat is taken — add seats first |
| The doctor never got the invitation email | Wrong address, or the mail landed in spam |
| Plans & billing is read-only | You are an ordinary member; only Owner and Admins can change it |
| The clinic exists but cannot be used | The seats have not been paid for — the clinic is not active |
The personal subscription suddenly reads Paused | By design — you are holding a clinic seat |