
Creating a New EMR
Recording a consultation and turning it into a SOAP note, including offline.
This is Medisa's main flow: record the consultation, then get back a SOAP draft ready for your review.
Before you start
- Signed in, with a workspace selected. See Authentication.
- Microphone permission granted in the browser.
- Recording quota available — the remaining balance is shown on the home screen.
- The patient already registered, or ready to be added on the spot. See Creating a Patient.
Steps
On the home screen, press Start Recording.
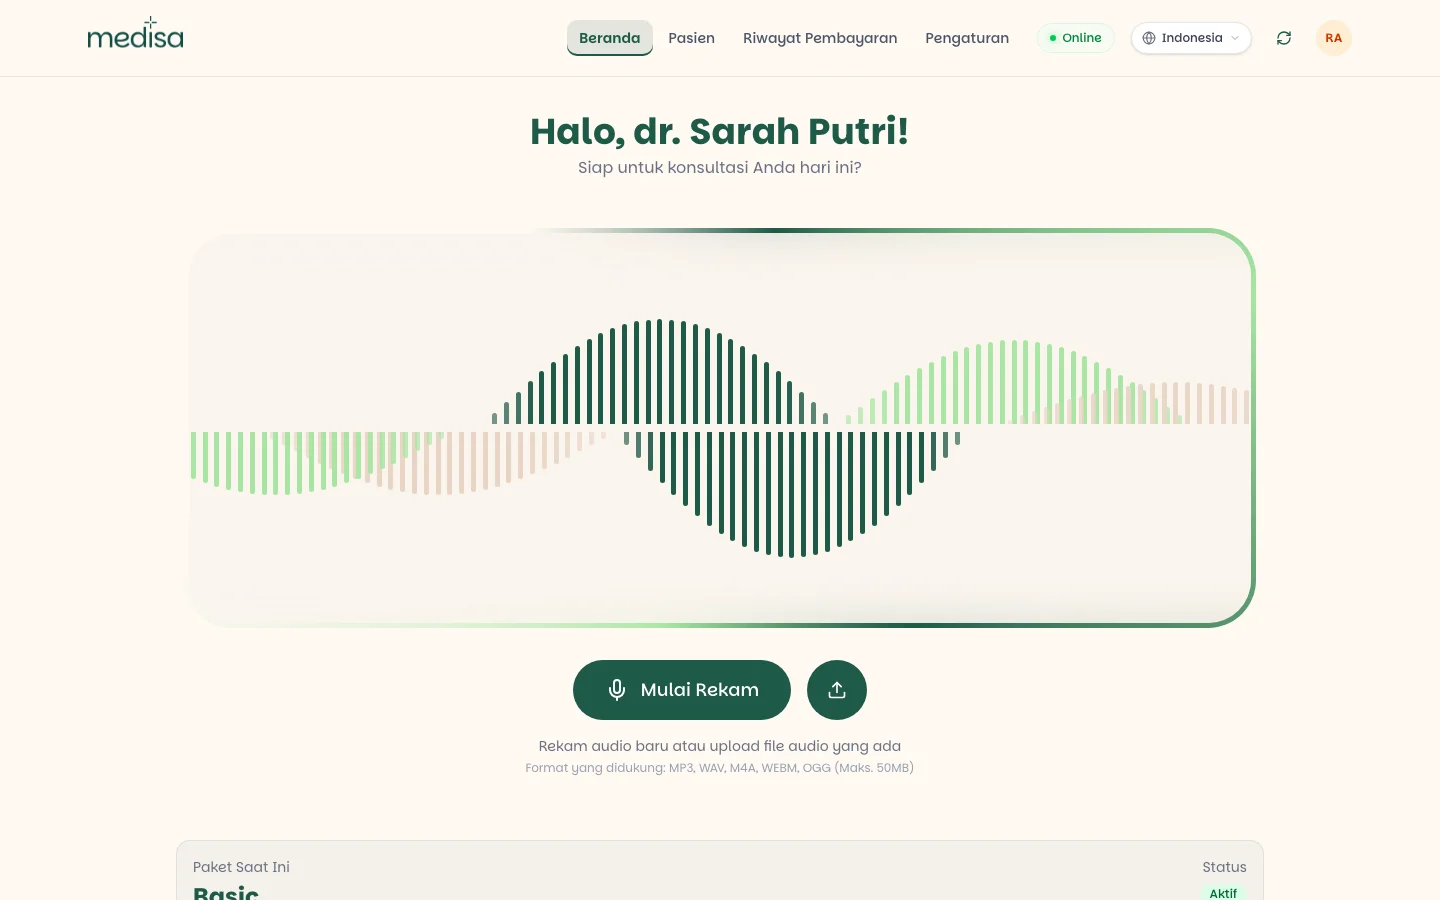
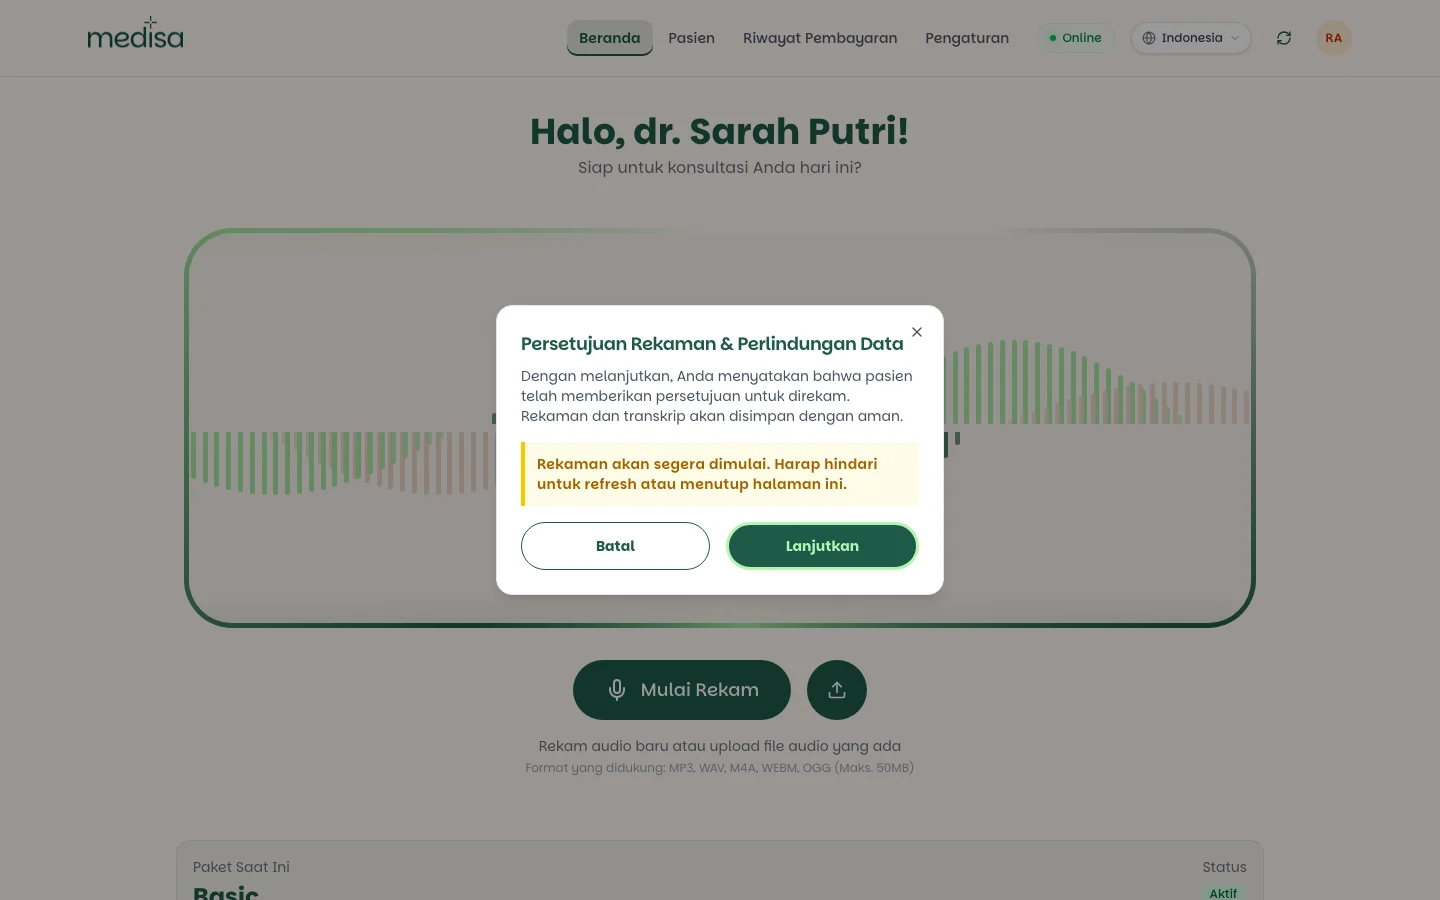
Confirm the recording consent. By continuing, you state that the patient has agreed to being recorded.
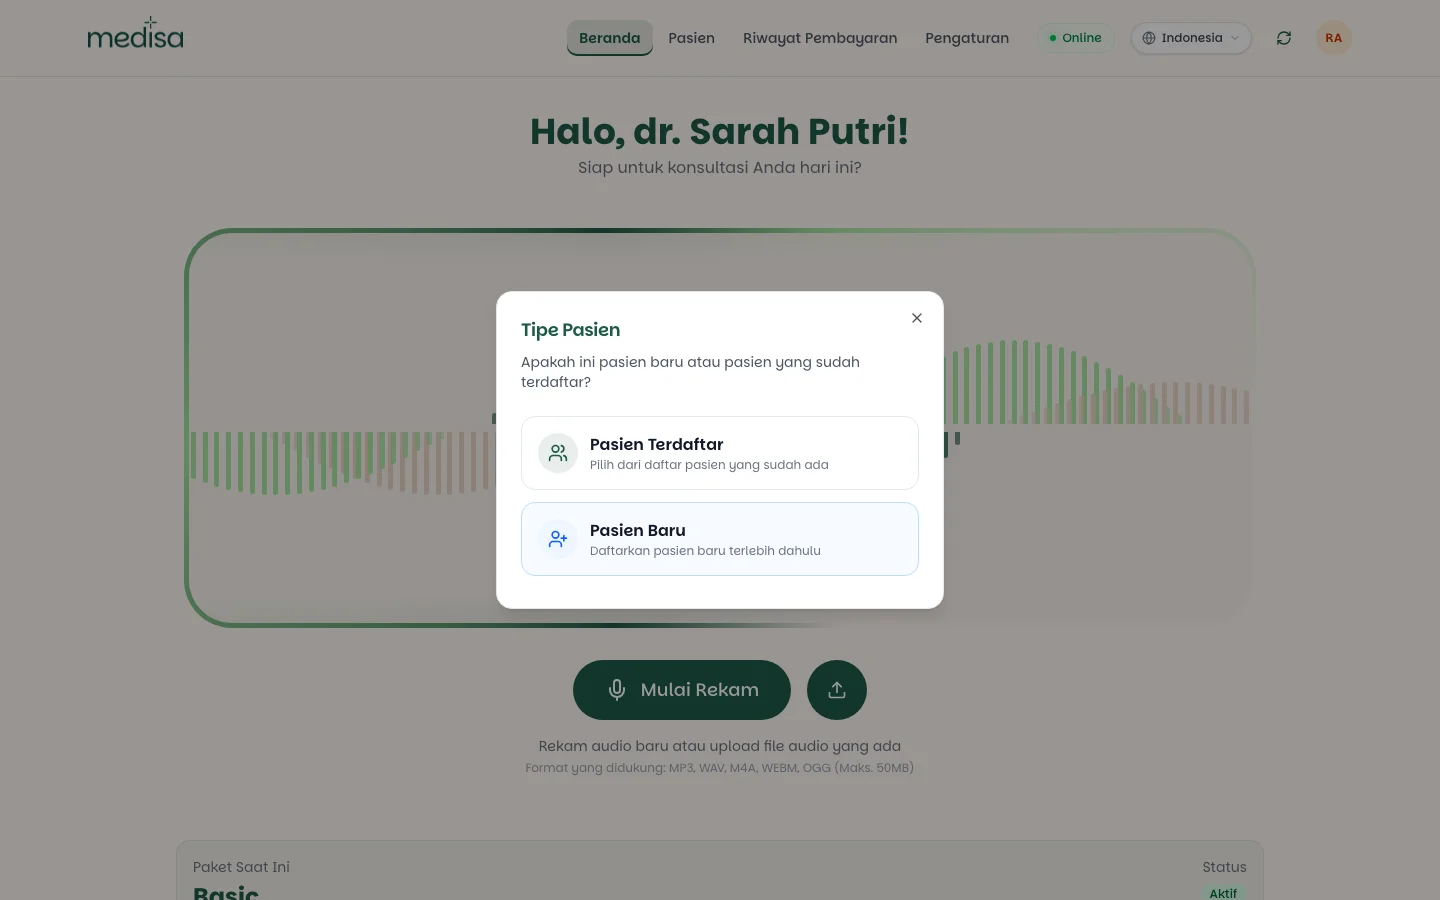
Choose whether this is a registered patient or a new patient.
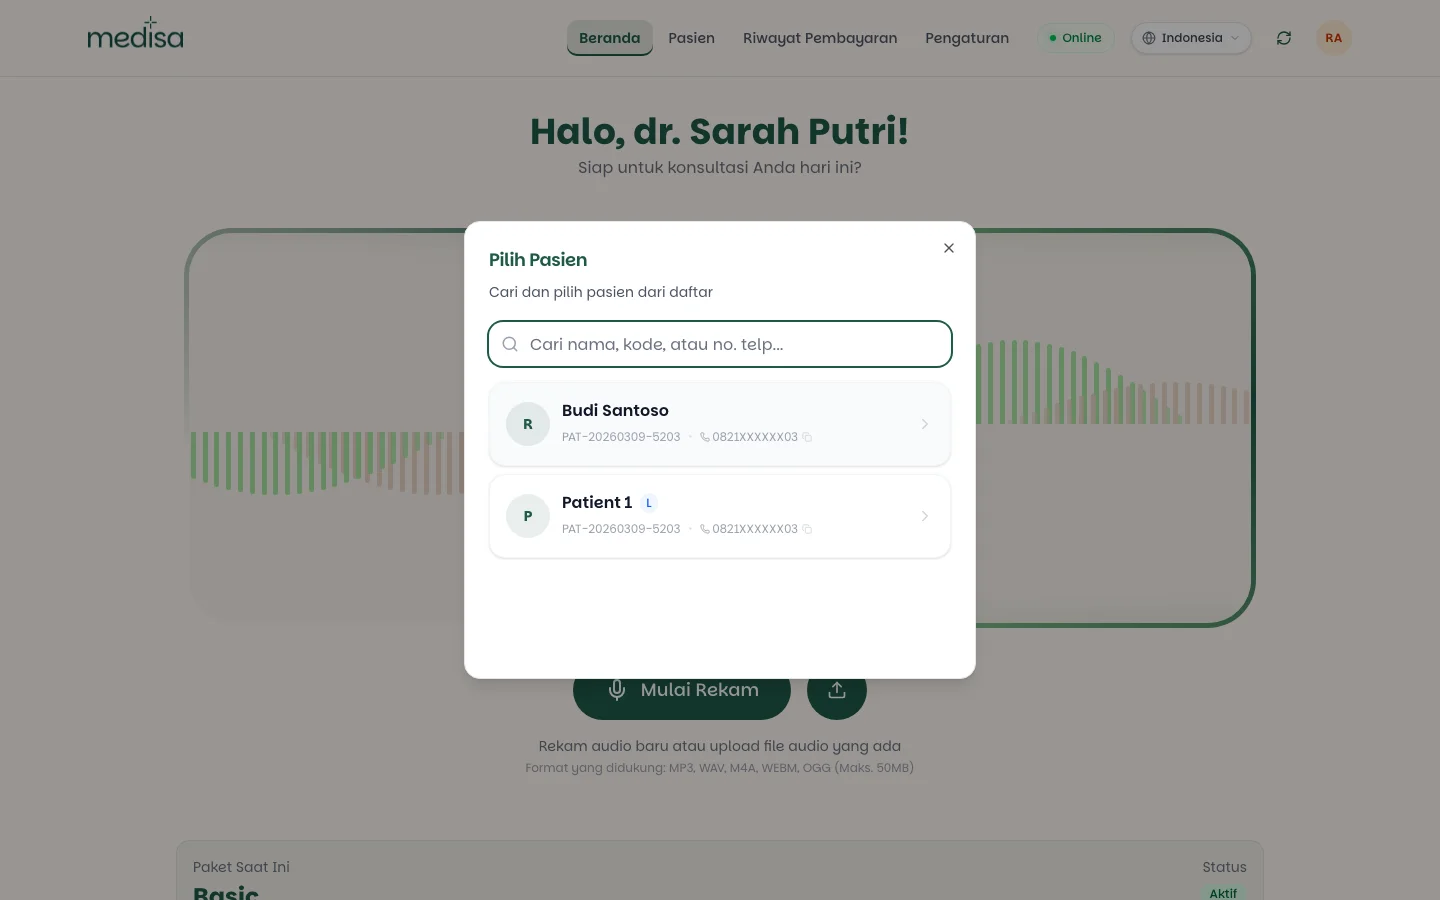
Find and select the patient from the list.
The selected patient appears above the recording panel. Press Start Recording again to actually begin.
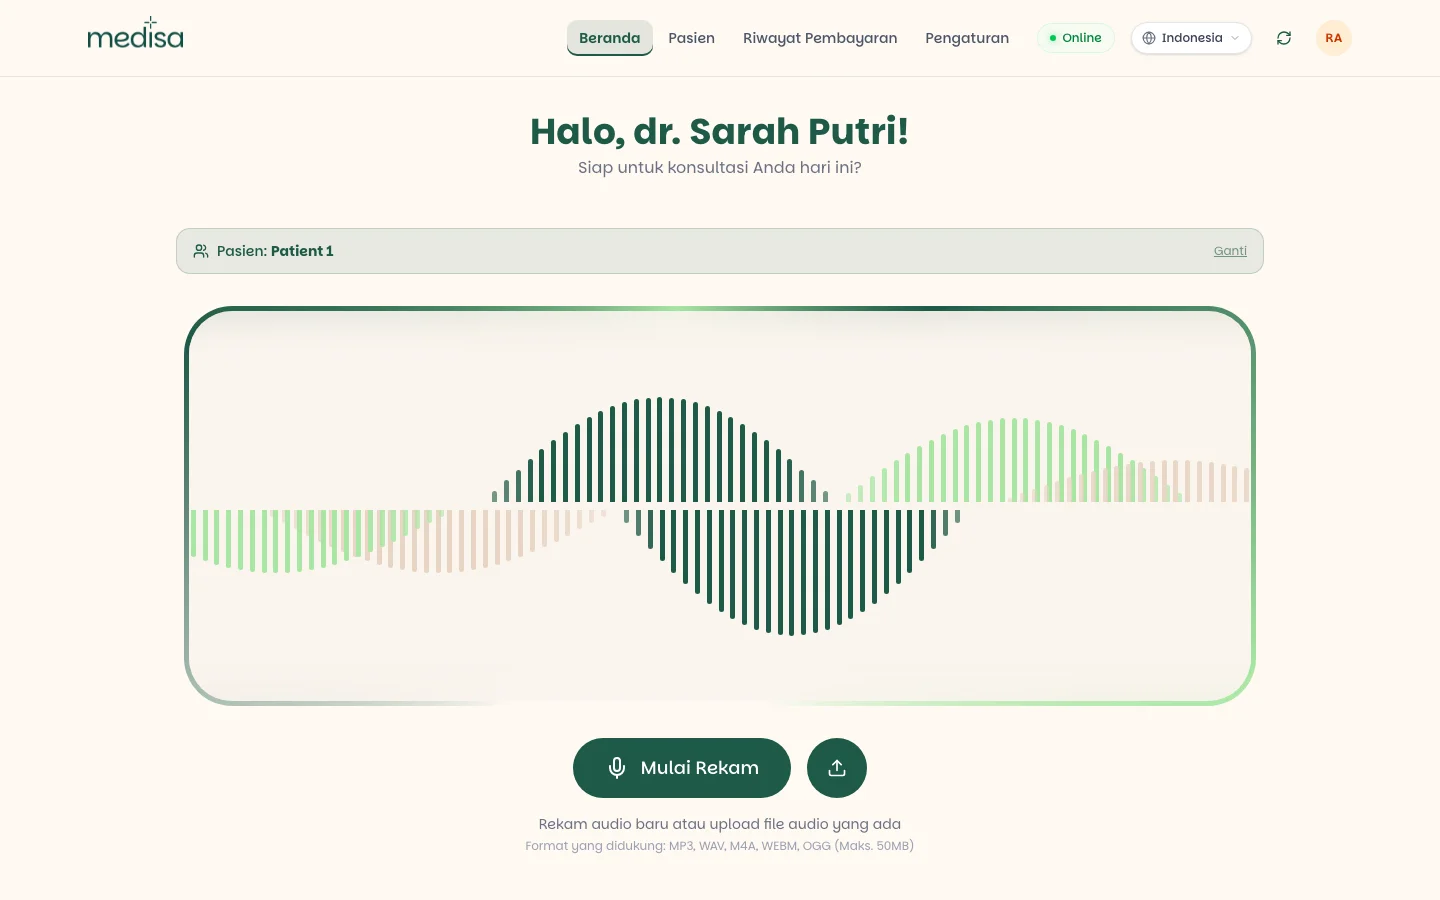
Hold the consultation as usual. While recording, audio is saved automatically every 30 seconds to your device.
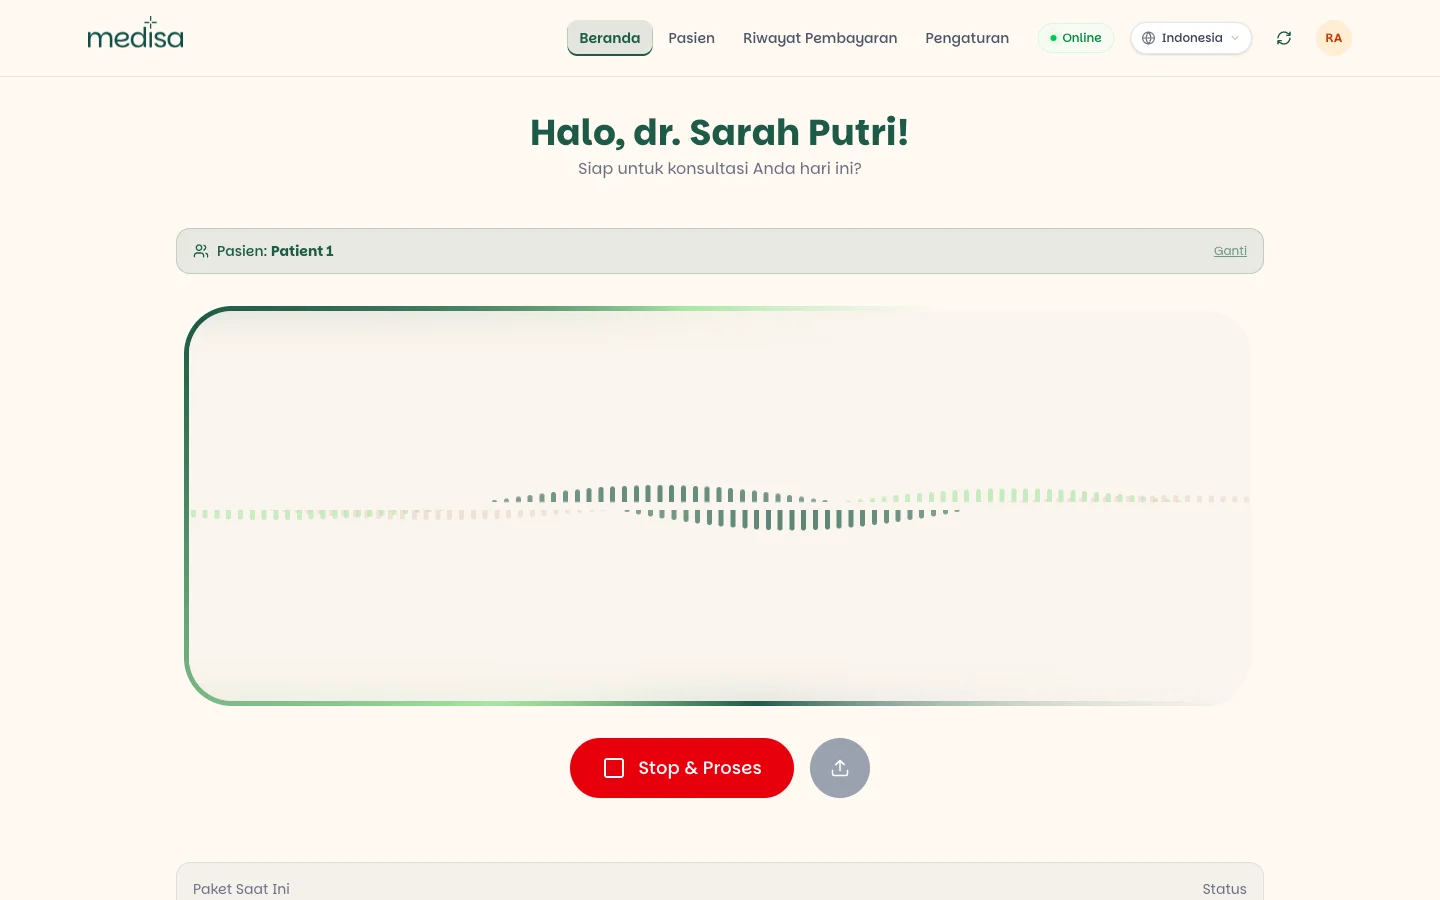
When you are done, press Stop & Process. The recording uploads, and Medisa transcribes it and composes the SOAP note. Progress is shown until it finishes — you can leave the page and come back later.
Processed recordings appear in the Medical Records list on the home screen.
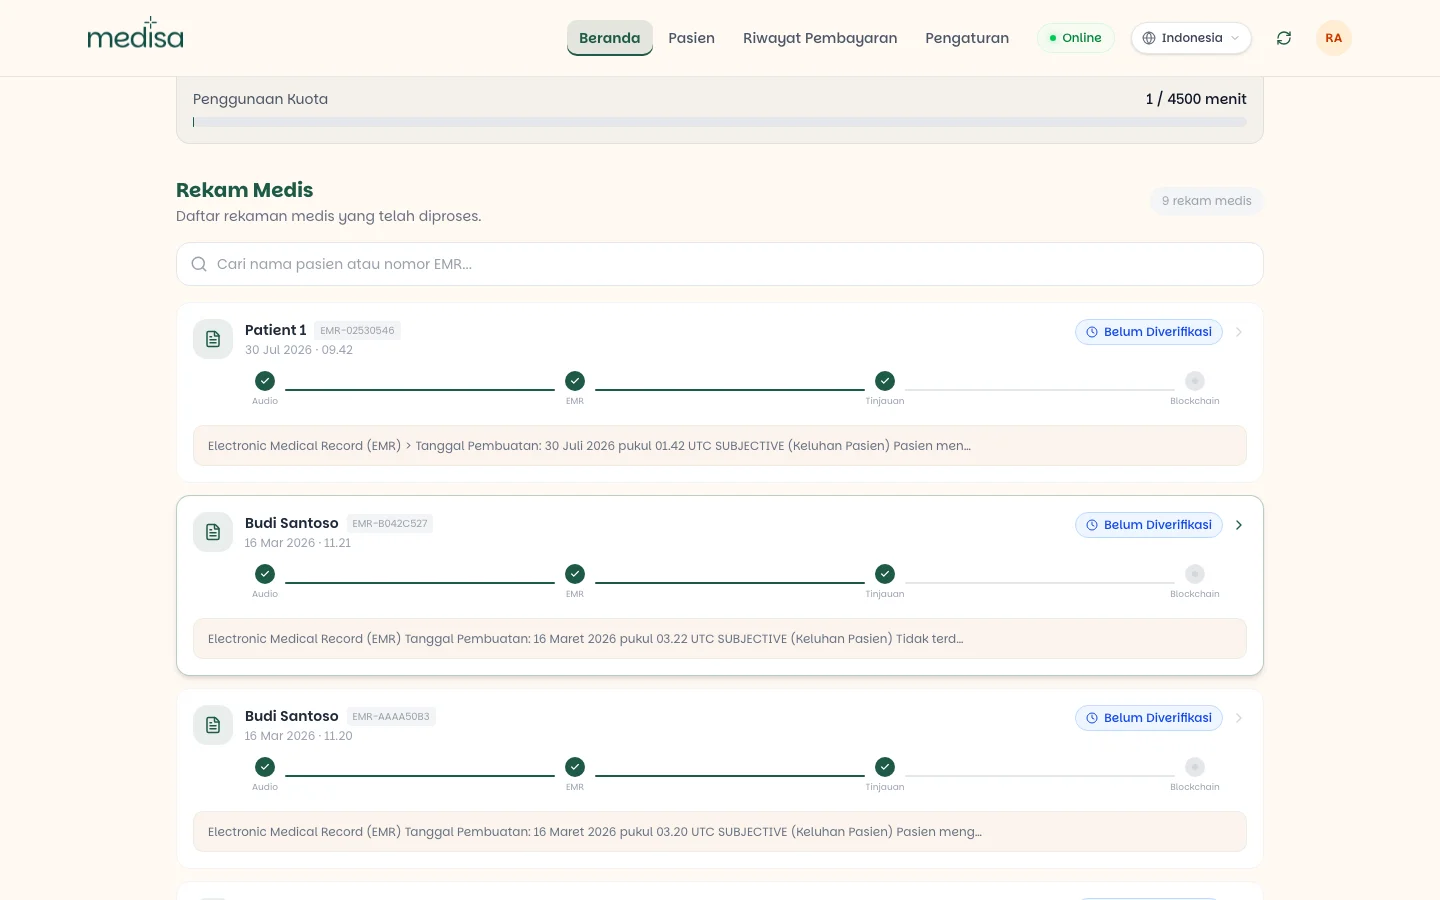
Open the record to read the result, then press Verify once the content is correct.
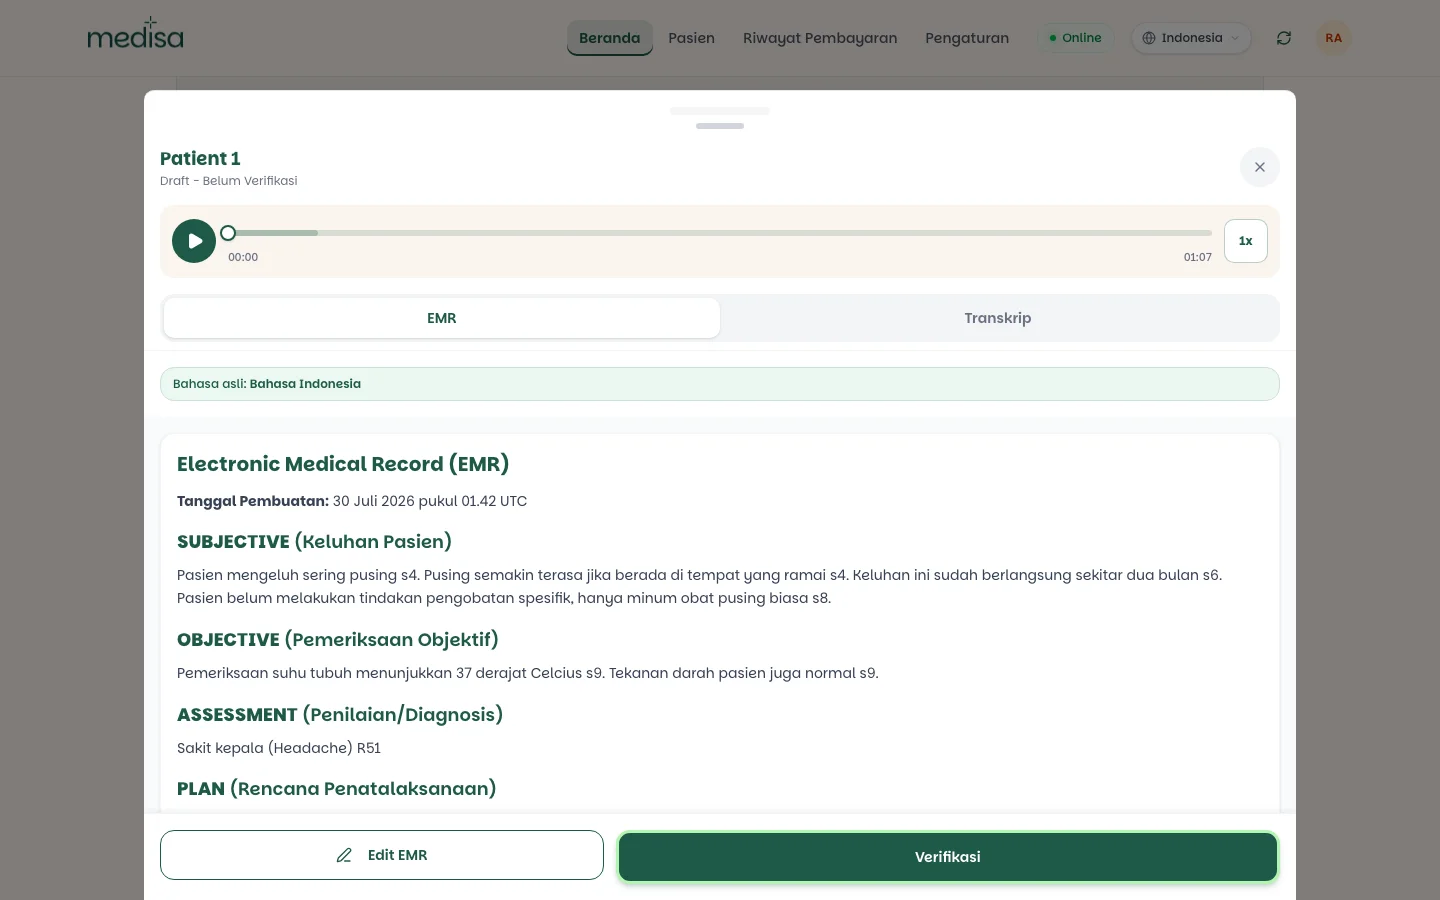
Reading the result
An AI draft always needs a doctor's review
The generated SOAP note is a draft, not a final document. While it is still Unverified, you have not signed off on it. Read it, correct what needs correcting, then verify.
A few things that help while reviewing:
- Citations such as
s4ors9mark the part of the transcript a point came from. Use them to check quickly whether the AI heard it right. - ICD-10 codes in the Assessment section are suggestions and still need your verification.
- The audio player at the top lets you replay anything you doubt. See Transcription & Audio.
- Need to change the content? Press Edit EMR. See Editing an EMR.
Language
The transcript follows the spoken language
The spoken language is detected automatically, and the transcript is always in the language of the conversation — never translated or overwritten. The record detail shows the original language, for example "Original language: Bahasa Indonesia".
Only the SOAP content can be translated, and that happens in the background without holding up saving. Any translated view is labelled as AI-generated.
If the connection drops
Recordings are written to device storage first, not straight to the server. So:
- Losing connection mid consultation does not lose the recording. The upload resumes on its own once the device is back online.
- App closed unexpectedly? The last automatically saved segment is still on the device.
- Failed uploads are retried a few times. If they still fail, the recording is marked as failed and you can resend it manually.
- Resending the same recording does not consume quota twice.
Uploading existing audio
If the consultation was recorded with another device, use the upload button to the right of the record button. Supported formats are MP3, WAV, M4A, WEBM, and OGG, up to 50 MB per file. Everything after that is identical to a live recording.
If something goes wrong
| Symptom | Most common cause |
|---|---|
| The record button does nothing | Microphone permission has not been granted in the browser |
| Recording will not start | Quota exhausted — check the remaining balance on the home screen |
| A recording sits in processing for a long time | The connection dropped; leave the app open once back online |
| The SOAP note feels thin | The audio was unclear — microphone too far away or a noisy room |
| The recording went to the wrong clinic | The active workspace was not the one you intended |
| Wrong patient on the record | The patient is bound before recording starts; use Change next time |